background

Showing posts with label Thank You cards. Show all posts

Tuesday, November 16, 2010

The Last Thank You!

The Last Thank You Card for Awhile!

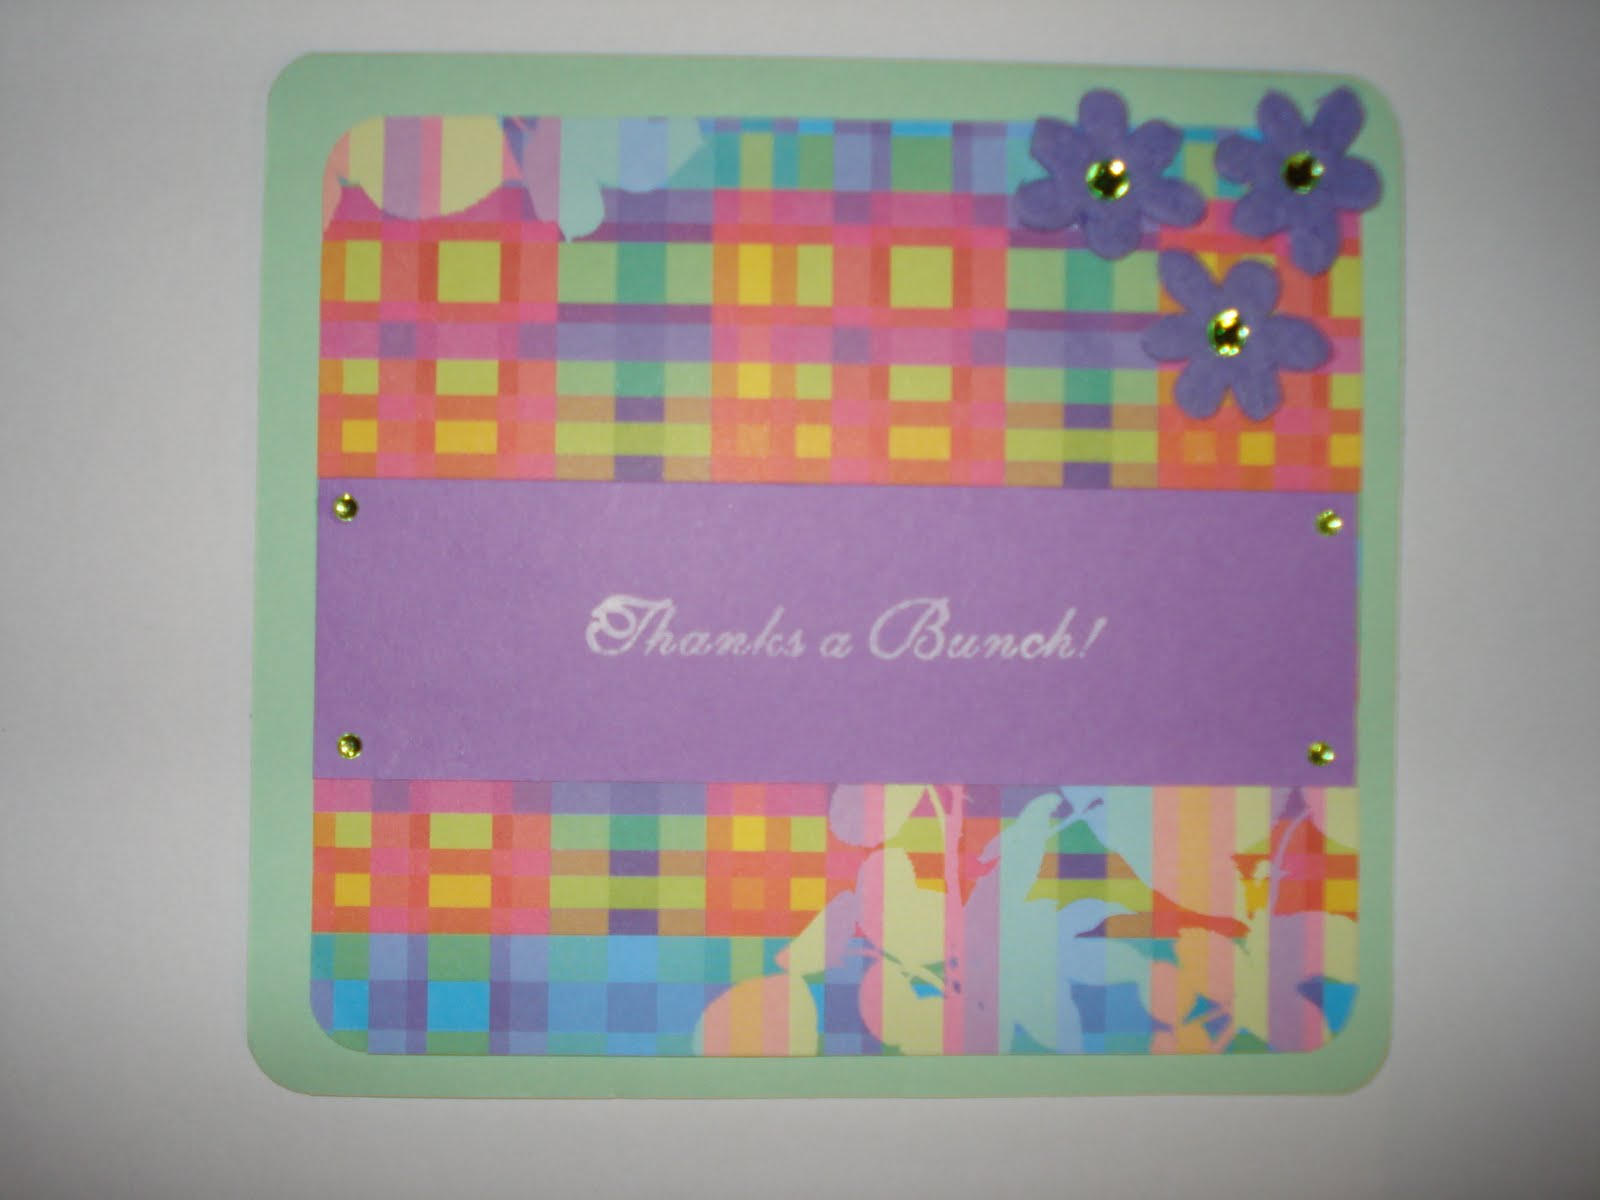
Finally! This is the last Thank You card that I have to make for my wedding gifts. It took me forever because I am, by nature, a procrastinator, but they are finally done and all sent away. Well, except for my daughter's which is in a pile of things that I am going to box up all together to mail to her. I just need to finish my Christmas shopping first!


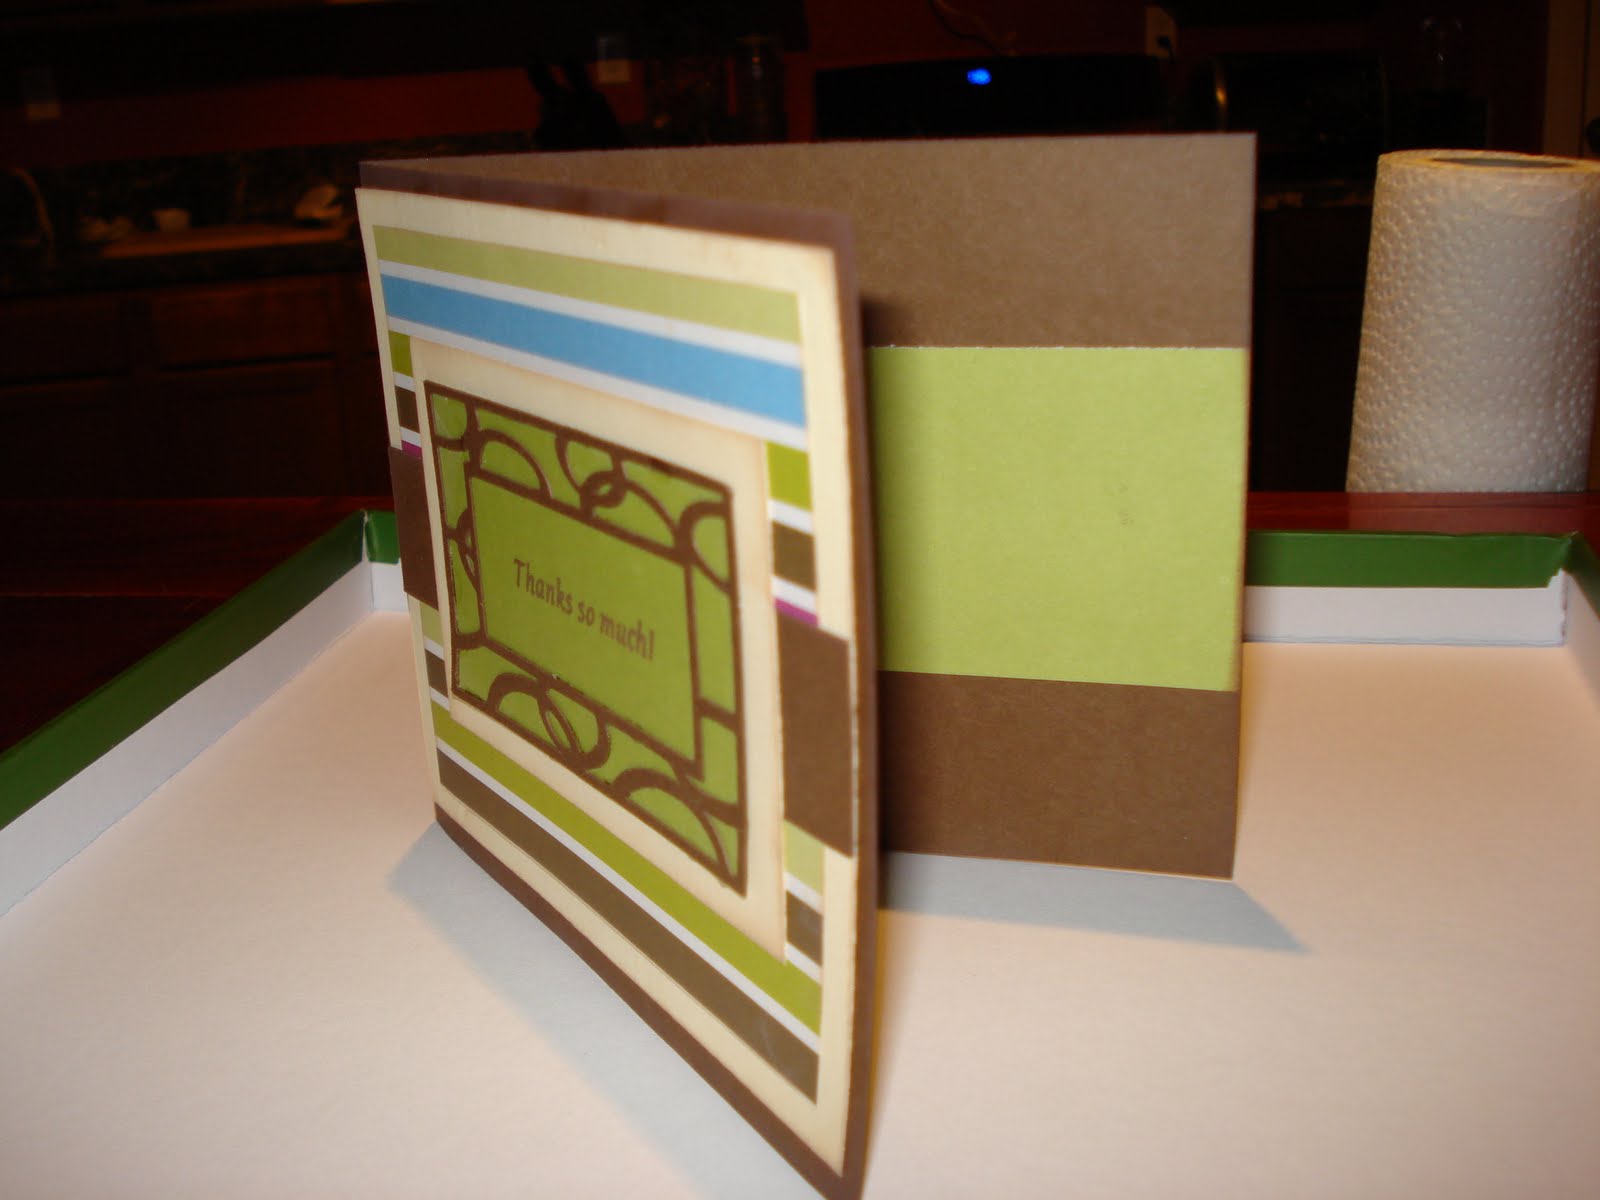
I decided to keep this card very simple. I used a brown card stock that is about the colour of a paper bag. The blue printed paper I used was from one of my packs that I bought at the dollar store. The ribbon is Dots and Dashes (love their ribbons) and I added a little bling with some blue pearls. A simple rubber stamp sentiment finished it off.


As you can see, I used dimensionals on the front and a strip of the printed paper on the inside. I am so excited to have these done because now that means I can get cracking on my Christmas cards. I have some new stamps from Close to My Heart and water colour pencils that I've been dying to try out. Whoot!

Sunday, November 14, 2010

New paper and an embossing tryout!

I was in Dollar Giant and picked up some packages of patterned paper. There are 10 sheets to a pack, and they are a fairly good quality paper considering they only cost 1.25! I made 2 more Thank You cards using this paper and card stock which I had gotten at Michael's in a multi-coloured pack. The card stock was 81/2 x 11 so I cut it in half (hamburger style for fellow teachers) and made 2 cards that are A2 size out of the one piece. For these two cards, I chose a chocolate brown as my base card.

Card #1

I chose a beautiful apple green paper for this card. The solid green rectangle was a scrap leftover from making an envelope. The ribbon is from Dots and Dashes and the button is from a package that I picked out of a dollar bin at Michael's. Instead of making a bow, I wrapped a strip around the top to layers (green on white) and tied a second piece to it. It is my fake bow! I did this because I already new that I wanted to add the button. I layered this piece onto a brown piece to hide the ribbon ends. Then I used dimensionals to adhere it to the front of my card which has a layer of green patterned paper. A simple brown stamp on the front was all that was required.

The inside is finished with a strip of the patterned green and a slightly wider strip of the solid green. This gives me a place to write as the brown is too dark. I think it gives the cards a much more polished look.


Card # 2
This card was meant to be folded the same as the other card, but since this was my first day at using my Martha Stewart scoreboard, it didn't turn out that way. When I went to score my fold-line, I made a mistake and scored it at 4" instead of 4 1/4". So I looked at it and decided I didn't want to waste it. This became my challenge card for the day. What I decided to do was to make the front flap of the card shorter (since it already was) than the back. I cut more of it off so that an inch of the inside of the card shows.

The printed paper layers are from my dollar finds and I had some scraps of the same chocolate brown that I used as alternate layers. The narrow brown strip across the middle of the card was the one that I had cut off the front. I used white ink from Close to My Heart to stamp the sentiment and used my clear embossing powder and heat tool (also from Close to My Heart) for the first time! It added a little sheen to the sentiment. I think I want to get a some sparkles or something to add into the powder to give it even more of a glint.

The inside of the card has a strip that I cut off of a 12 x 12 piece of paper. I thought it looked like a border and would be perfect for the visible part of the card. I then added a simple white rectangle for writing on.

I hope you like these cards. I am very happy with them and I have only to make one more thank you and then I can start my Christmas cards! Yippee!!!

Monday, November 8, 2010

No cricut cuts on these babies!

Here are 2 more Thank You cards that I made, using strips of card stock that I had laying around and paper from my little 6 x 6 Dollar Store pads of paper. My cutting mat has lost its stickiness so I decided to just do a couple of cards using my paper cutter and one of my stencils from CM. I am very happy with how they turned out.


Card #1

At first I had the diamonds all centered within each other and then by accident when I set them aside, they slide into this pattern. I liked it and kept it! A couple of small pearls add a little glamour without too much bling. This card has a more masculine feel to it, I think.


Card #2

I love the burgandy and pink combination on the front of this card. The other colour is a dark gray which is the colour of the faint lines in the patterned paper. The inside was too dark to write on, so I added a piece of light gray card stock and made a little layered embellishment with a stamped sentiment on it. Overall, I think everything flowed together quite well on this card.

Sunday, November 7, 2010

Simply Thankful

These are the two cards that I made this evening. I started with leftover pieces of card stock that I just folded in half to make a card. They ended up being 5 1/2" x 5". My last card had several mats but these two are very simple and only the second one has a Cricut cut.

Card #1


This card used a piece of patterned paper from a 6 x 6 pack of dollar store paper. The purple strip was a leftover scrap. The 3 little purple flowers are felt and I cut them off of some ribbon that I found in the $1 bin at Michael's. I put some pale green gems at their centres and used the same colour but smaller gem on the four corners of the purple strip. They were from Studio18 in a pack of 50 of varying sizes for $1. The sentiment is a wooden stamp that I got in a small set from the dollar store and I used Pamass pigment ink which is also from a dollar store. It is not the best quality ink but I picked up a few colours to practice with before I spend money on better quality stuff.

Card #2


This card started with a piece of burgundy brown CM card stock and I layered a piece of printed paper on it that had come out of one of my Dollar Giant 6 x 6 paper pads. These little pads have been great and so cheap!. The ribbon is from Dashes, Dots, and Checks. The bright pink and green papers were in a pack of card stock that I picked up at Michaels. I used a frame cut with my Expression and it is from the cartridge Graphically Speaking, and I added a couple of pale purple pearls. Again, the sentiment is a wooden stamp and the ink is Pamass.


The inside of this paper has the other part of the ribbon, so I added a strip of the patterned paper underneath of it, just to finish it and tie it into the front. The area for writing on is the negative cuts that were leftover from the frame. I thought this was a smart and creative way to use them up as the card itself is too dark of a colour to write on!

Friday, November 5, 2010

Beautiful Brown!

I had a leftover piece of brown card stock that I decided to use for a card base. When folded it measured 5 1/2" by 4 1/2". I knew I wanted to try adding more mats to a card so this was my attempt. I am quite happy with it.


I used some leftover ivory card stock from my wedding programs and I used part of a sheet of green paper from my K1 Memories Funky Paper Pad II. The striped paper is also from this pad originally and was a bit that was left over from another project. I chose to run the stripes horizontally this time for a change. The sizes were as follows: ivory 5 1/4 x 4 1/4; striped 4 3/4 x 3 3/4; and the centre ivory 3 1/2 x 2 1/2.

The brown stripe under the centre medallion is two little strips that I had left over from the centres of frames. The frame is in the same dark brown card stock and it is from Wild Cards. I cut it at 3 1/2. Then I simply used my paper cutter to cut a piece of green paper to mat underneath of it. I decided not to pop-dot my medallion this time as it is going to be mailed. The sentiment was one of a small set of rubber stamps that I had picked up at the dollar store and I used my creamy brown Cat Eye to ink it.


I also used my Chestnut Brown and Creamy Brown to ink around all of my papers. I used a left over strip of green for the inside so that I can write on it.

I hope you like this card.

Monday, November 1, 2010

Bird Bonanza

Fantabulous Cricut's Challenge Me Monday was to create a project using something having to do with a bird. Since I still require more Thank-You cards (some day I will be done them). I chose to make a card using the oval from Wild Card. I thought it looked a bit like a fancy cage.


The bird was cut using the mini cartridge Home Decor. I liked the tail on this bird! I chose to do both the base and the blackout in white and cut it at 4". Then I added some white glitter to the base before gluing it to the blackout. I really like the white on white. This picture doesn't do it justice. Originally, I had planned to put the bird on the inside and just leave the card base open, but the bird didn't really show up, so I lined the card and then used small dimensionals to pop the bird on the front. Then after I was done, I decided it still didn't look finished so I inked the edges, added a ribbon and some bling. A much more finished looking card now I think!


On the inside of the card, I used a stamp to say Thank You. I am not too happy about how the stamp turned out. I really need to practice stamping. I also put a lining on the left side so that it was not just white paper. I hope you like my little bird. As I said it has a little twinkle to it that just doesn't show up in the picture!

Purpleiscious Thank You Cards

Here is a few more Thank You's. You must be getting as tired of looking at them as I am of making them. These ones I made out of scrap bits of cardstock and then I found some coordinating printed papers in my 6 x6 packs that I found at the dollar store.

I like how this one looks like a book.


This one kind of looks like a belt and buckle.


The lime green really set off the paint splotch paper and of course, I added some lighter writing spaces inside. The purple butterfly and flower on the one card are from Creative Memories (old) and of course, I used my Expression to cut the sentiments.